In the next few articles from the Automation Tools Series, I will show you different test automation reporting solutions. Finally, there will be an article comparing them showing their pros and cons. Test automation reporting and visual representation of test results is something crucial for the successful test automation project. Moreover, it can save you a lot of time analyzing the tests results, especially if there are many failing entries. The integration with this type of solution is one of the main features of the 5th generation test automation frameworks.
What is Allure?
Allure Framework is a flexible lightweight multi-language test report tool that not only shows a very concise representation of what have been tested in a neat web report form. Allure reports shorten common defect lifecycle: test failures can be divided on bugs and broken tests, also logs, steps, fixtures, attachments, timings, history and integrations with TMS and bug-tracking systems. Also, provides a clear ‘big picture’ of what features have been covered.
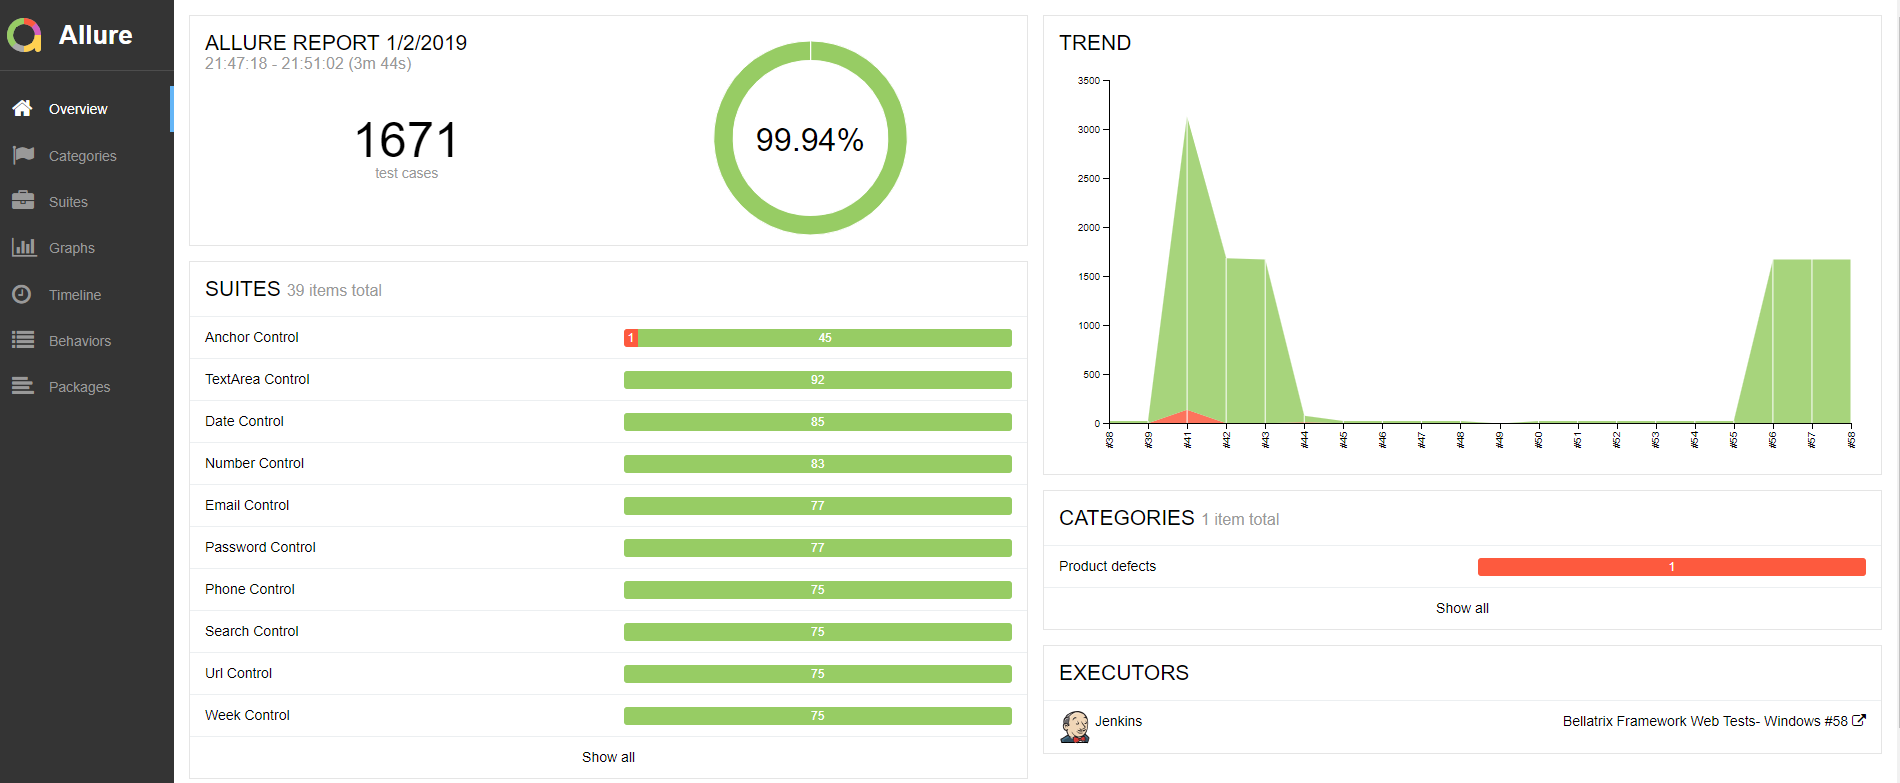
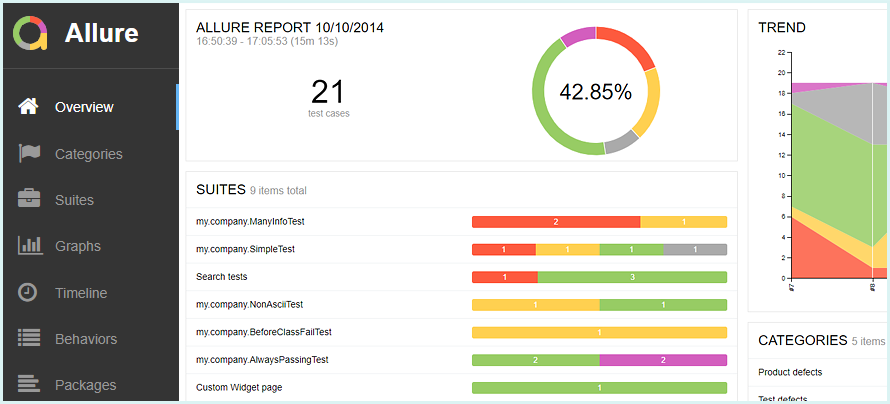
On the first page, you can find a trend of the latest runs. Also, if you have defined any test suites, you will see them and the associated tests count.
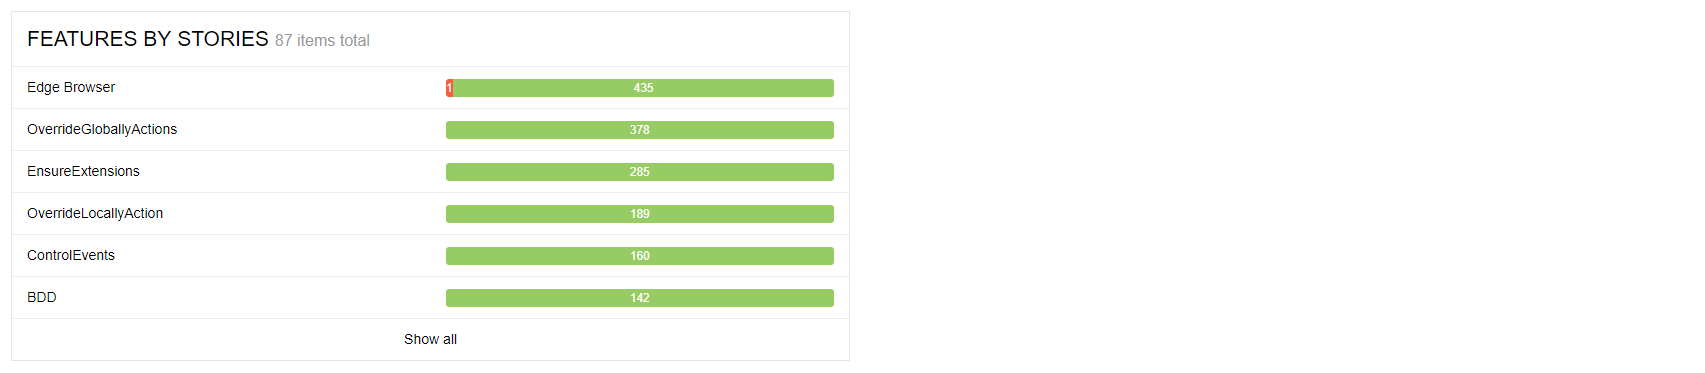
At the bottom of the page, you can find a grouping of your tests by features.
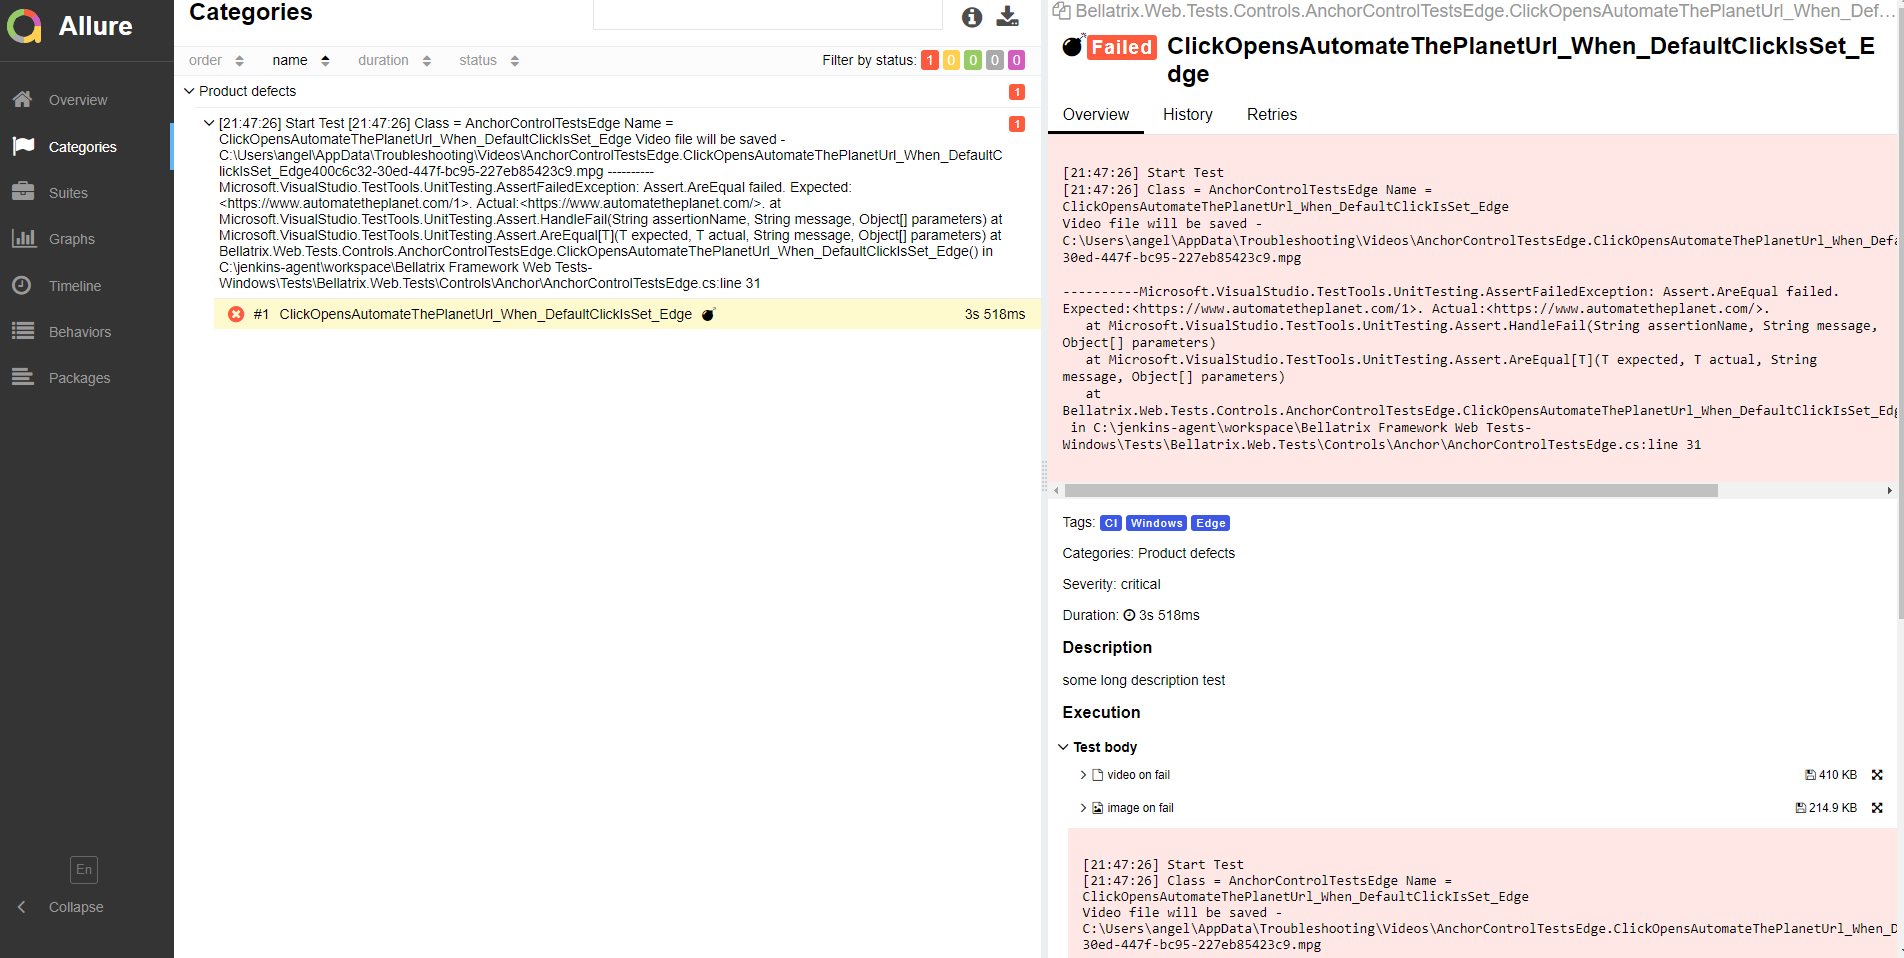
If you click on the second tab called Categories- you will see your test failures analysed and grouped by failure types.
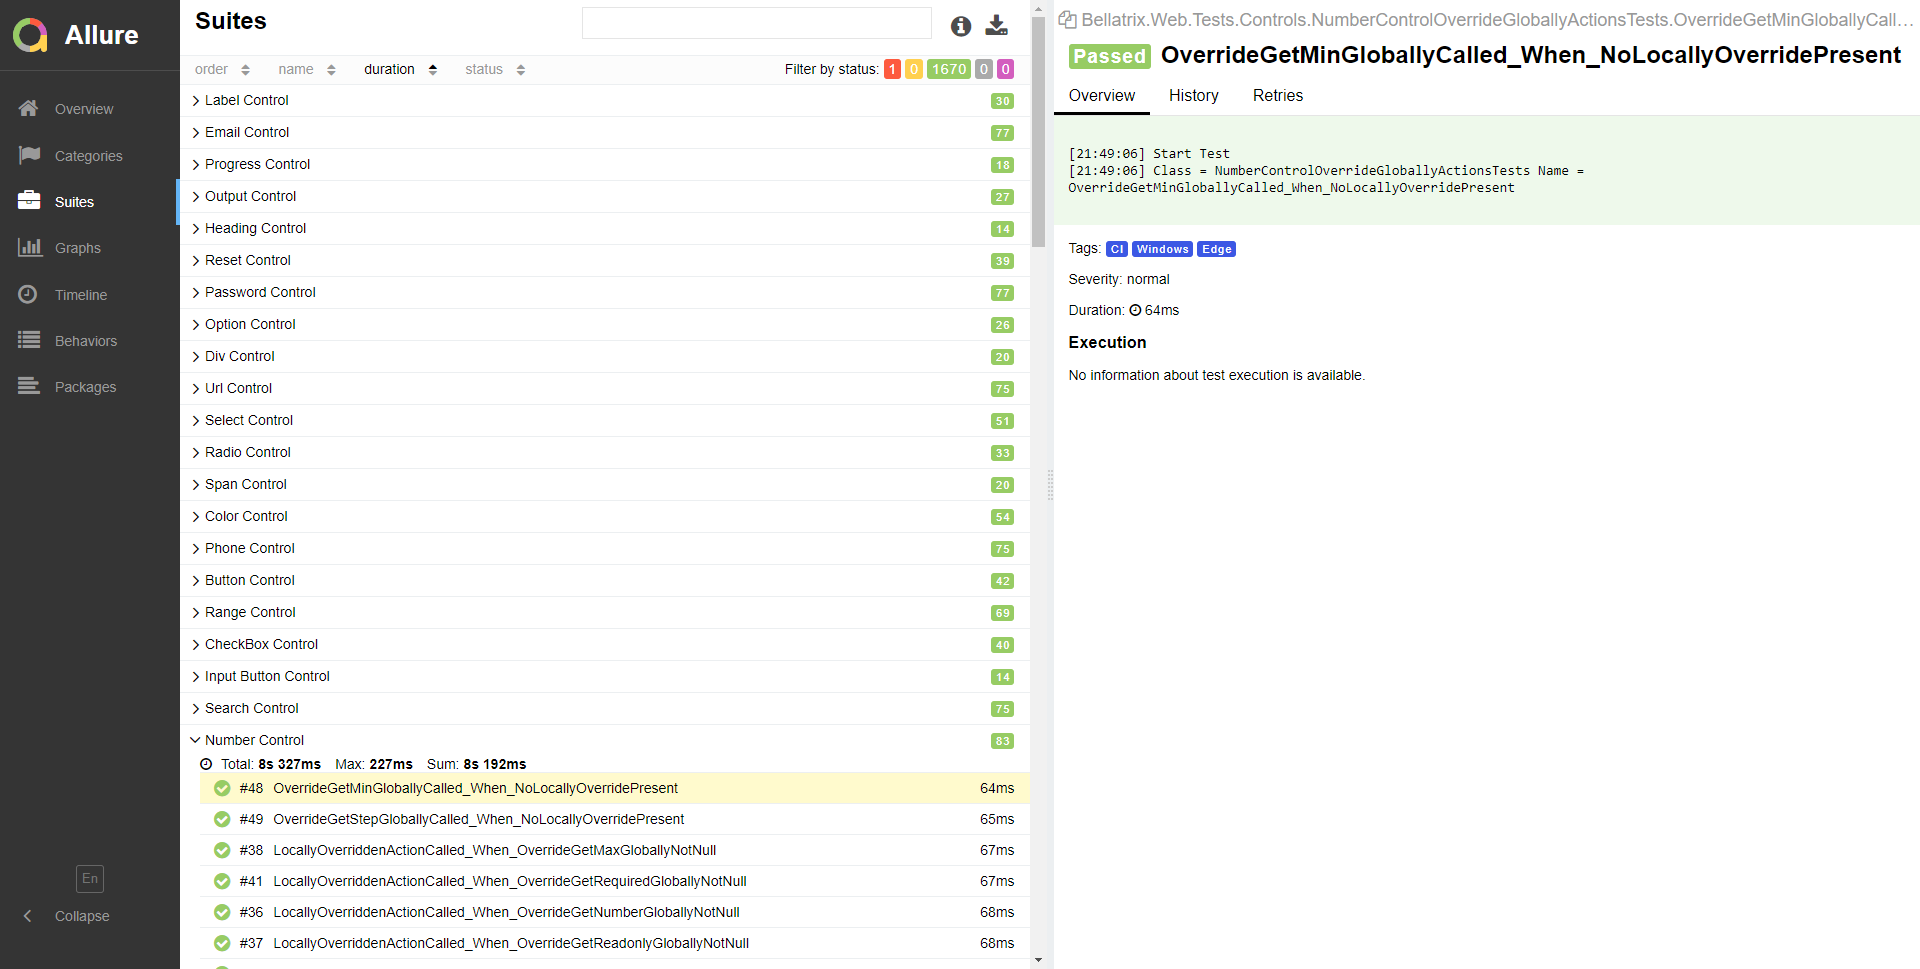
On the third tab called Suite- you will find all of your tests grouped by suites, locate their execution time and the suite total execution time. If there are any failed tests if you click on them, you will see the failed information in the right panel.
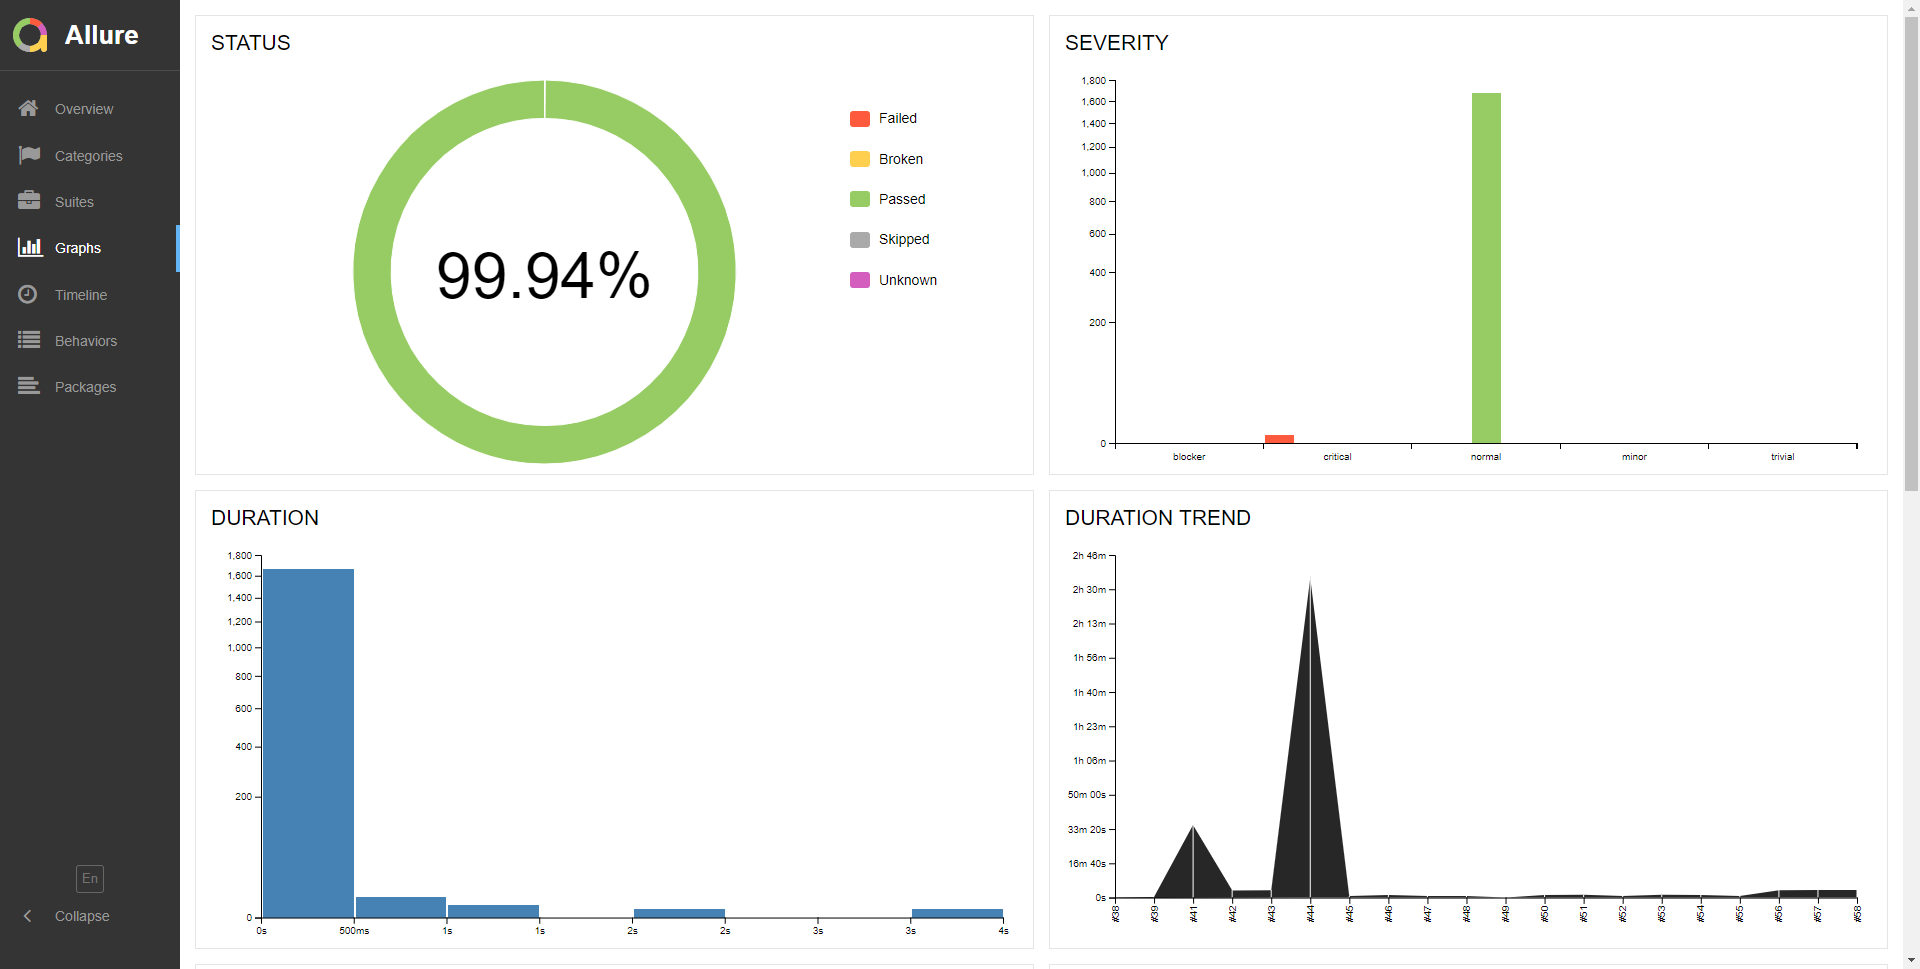
The tool also includes some cool summary charts.
How it works?
Allure is based on standard xUnit results output but adds some supplementary data. Any report is generated in two steps. During test execution (first step), a small library called adapter attached to the testing framework saves information about executed tests to XML files. We already provide adapters for popular Java, PHP, Ruby, Python, Scala and C# test frameworks.
During report generation (second step), the XML files are transformed to a HTML report. This can be done with a command line tool, a plugin for CI or a build tool. See examples and documentation for more details.
How to Install It on Windows?
For Windows, Allure is available from the Scoop CLI installer.
To install Allure, download and install Scoop and then execute in the Powershell: scoop install allure
Manual Installation
-
1. Download the latest version as zip archive from Maven Central.
-
2. Unpack the archive to allure-commandline directory.
-
3. Navigate to bin directory.
-
4. Use allure.bat for Windows or allure for other Unix platforms.
-
5. Add allure to system PATH.
To run CLI application, Java Runtime Environment must be installed.
For other operating systems refer to the official documentation.
How to Integrate Allure with NUnit Test Project?
First, Allure can be integrated to any kind of test project- unit, integration, DB, API, web, mobile tests.
For the demo project we will test a simple Calculator library.
public class Calculator
{
    public int Square(int num) => num * num;
    public int Add(int num1, int num2) => num1 ez_plus num2;
    public int Multiply(int num1, int num2) => num1 * num2;
    public int Subtract(int num1, int num2)
    {
        if (num1 > num2)
        {
            return num1 - num2;
        }
        return num2 - num1;
    }
    public float Division(float num1, float num2) => num1 / num2;
}
We need to install the following NuGet packages:
-
Microsoft.NET.Test.Sdk
-
NUnit
-
NUnit3TestAdapter
-
NUnit.Allure
To integrate Allure Framework in your tests, you need the last one. It gives you many attributes, and it integrates Allure in the NUnit test execution pipeline.
[AllureSuite("CalculatorTests")]

class CalculatorAddTests
{
    [Test(Description = "Add two integers and returns the sum")]
    [AllureTag("CI")]
    [AllureSeverity(SeverityLevel.critical)]
    [AllureIssue("8911")]
    [AllureTms("532")]
    [AllureOwner("Anton")]
    [AllureSubSuite("Add")]
    public void Return4_WhenAdd2And2()
    {
        var calculator = new Calculator();
        int actualResult = calculator.Add(2, 2);
        Assert.AreEqual(4, actualResult);
    }

    [Test(Description = "Add two integers and returns the sum")]
    [AllureTag("CI")]
    [AllureSeverity(SeverityLevel.critical)]
    [AllureSubSuite("Add")]
    public void Return0_WhenAdd0And0()
    {
        var calculator = new Calculator();
        int actualResult = calculator.Add(0, 0);
        Assert.AreEqual(0, actualResult);
    }

    [Test(Description = "Add two integers and returns the sum")]
    [AllureTag("CI")]
    [AllureSeverity(SeverityLevel.critical)]
    [AllureSubSuite("Add")]
    public void ReturnMinus5_WhenAddMinus3AndMinus2()
    {
        var calculator = new Calculator();
        int actualResult = calculator.Add(0, 0);
        Assert.AreEqual(1, actualResult);
    }
}
Add [AllureNUnit] attribute to test classes where you want to use Allure. Add more attributes to tune the display in the report like Severity, Tag, SubSuite, Feature, etc.
Allure Configuration
Next you need to add a new JSON file to the project called allureConfig.json. Make sure to be copied to output directory on build.
{
  "allure": {
    "directory": "allure-results",
    "links": [
      "https://github.com/AutomateThePlanet/Meissa/issues/{issue}",
      "https://github.com/AutomateThePlanet/Meissa/projects/2#card-{tms}",
      "{link}"
    ]
  }
}
The directory parameter specifies where the Allure XML files will be saved by the plugin. Next in the links collection we can configure the bug tracking and TCM system integrations.
Allure Custom Categories
As mentioned the tool can analyse the tests failures and group them in failed categories. There are two categories of defects by default- Product defects (failed tests) and Test defects (broken tests).
To create custom defects classification add a categories.json file to the allure-results directory before report generation.
[
  {
    "name": "Ignored tests",
    "matchedStatuses": ["skipped"]
  },
  {
    "name": "Product Bug",
    "matchedStatuses": ["broken", "failed"],
    "messageRegex": ".*AssertionException.*"
  },
  {
    "name": "Calculator Problem",
    "matchedStatuses": ["failed"],
    "traceRegex": ".*DivideByZeroException.*"
  }
]
However, the “copy to allure-results directory” part is a little bit trickier since if you set the file to be copied to the output directory, it won’t be placed in the correct folder. To handle this, we can add the following MSBuild code to the project file.
<ItemGroup>
    <Categories Include="categories.json" />
</ItemGroup>
<Target Name="CopyCategoriesToAllureFolder">
    <Copy SourceFiles="@(Categories)" DestinationFolder="$(OutputPath)allure-results" />
</Target>
<Target Name="PostBuild" AfterTargets="PostBuildEvent">
    <CallTarget Targets="CopyCategoriesToAllureFolder" />
</Target>
How To Generate the Allure Report?
1. Run tests with any test runner. Generated Allure reports will appear in directory you configured with allureConfig.json
2. Generate the report the following CMD command:
allure generate "allure-results-directory" --clean3. Open the report through the following CMD command:
allure open "allure-report-directory"How to Integrate Allure with MSTest Test Project?
MSTestAllureAdapter allows you convert an MSTest trx file to the XMLs from which an Allure report can be generated. Because MSTest does not have an extension or hook mechanism this adapter cannot run as part of MSTest but instead it converts the resulting trx file to the xml format expected by Allure.
Run the following command: *MSTestAllureAdapter.Console.exe
How to Integrate Allure with Jenkins?
1. Install the latest version of Allure Plugin from “Plugin Manager” page.
2. Open Plugin Advanced Settings
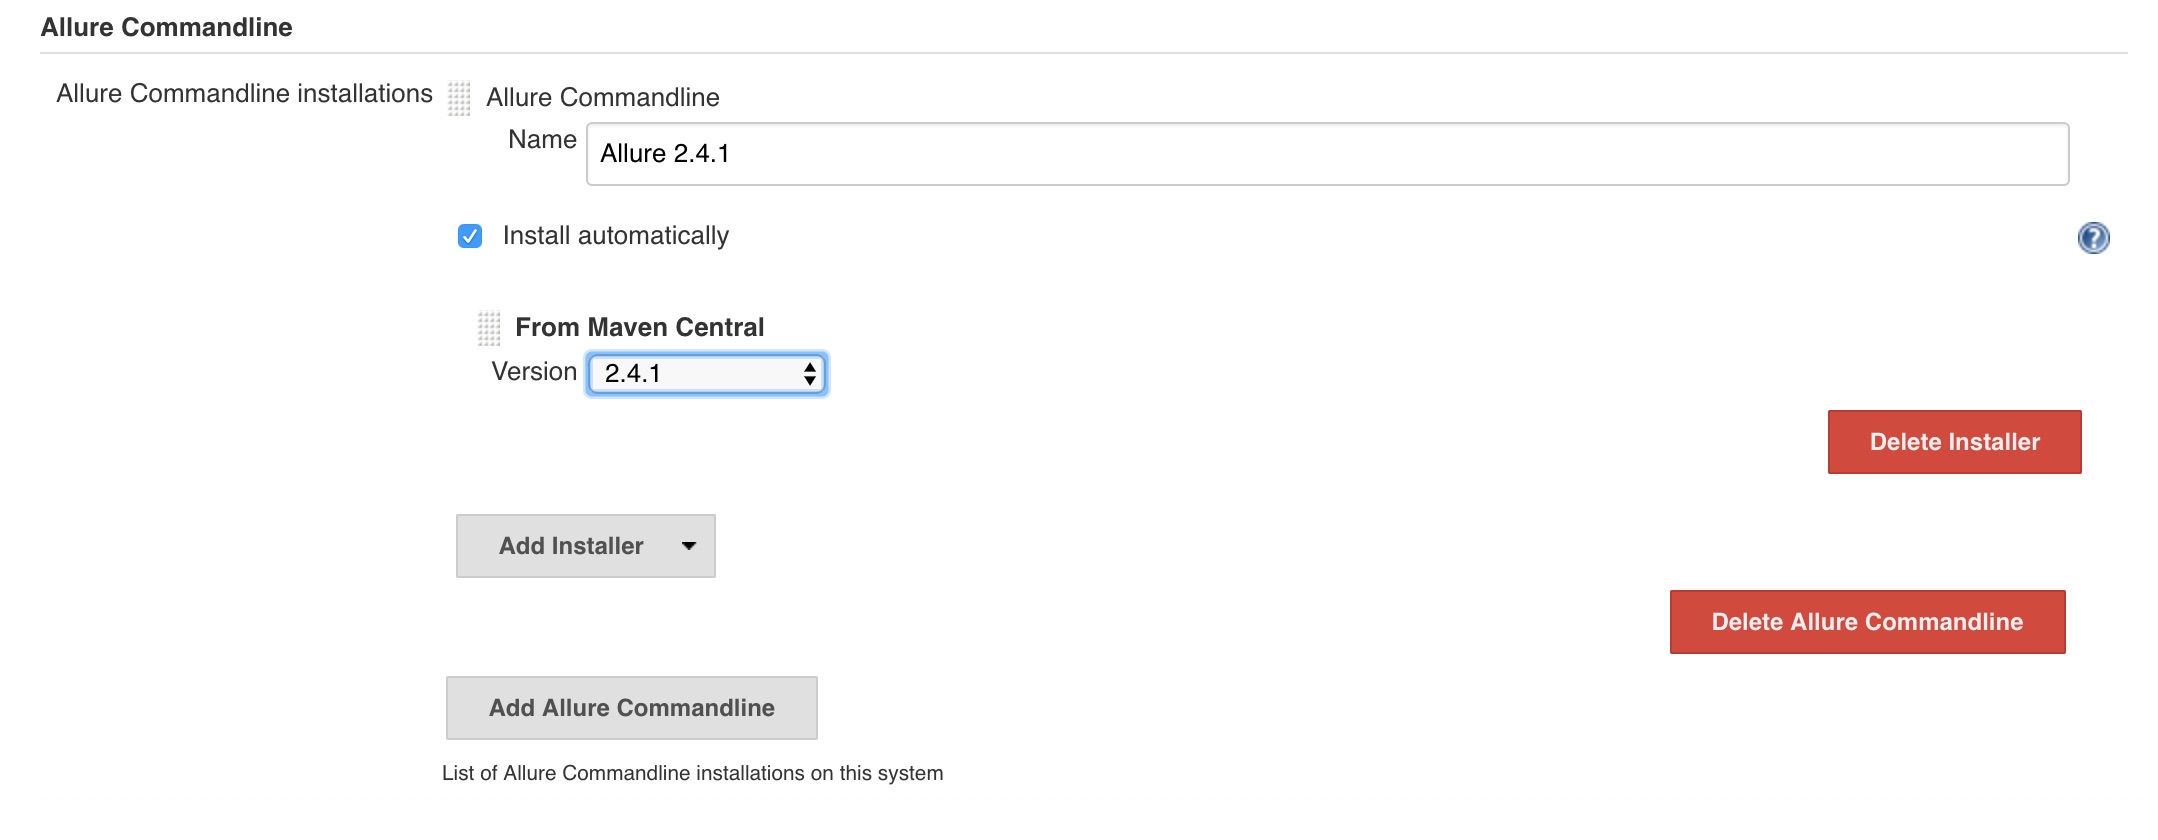
3. Find “Allure Commandline” from “Global Tools Configuration”.
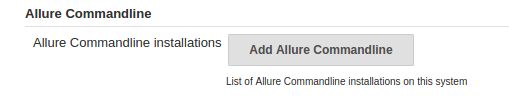
4. Click “Add Allure Commandline” button.
Job Configuration
1. Open job configuration page.
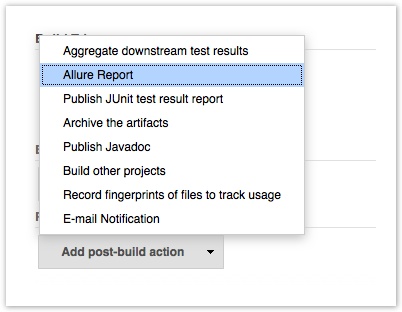
2. Add Allure Report post build action.
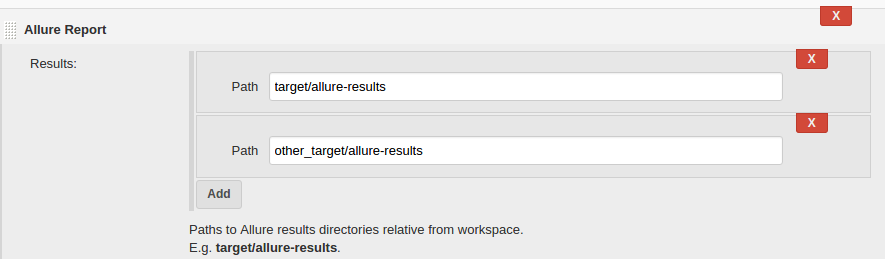
4. Configure the Allure Report.
Usage
When build is finished a link to Allure report will appear on the build page and also in the build history entries:
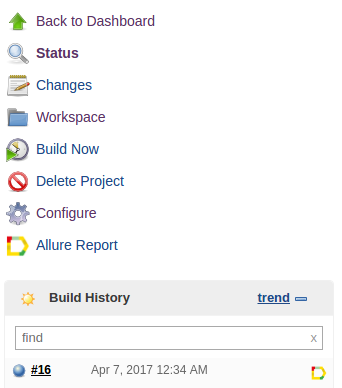
Generated Allure report is stored in the artifacts folder of the build and can be processed the same way as all the other artifacts, or downloaded as .zip archive.
Allure supports history for tests in the report. At the every report generation during the build Jenkins Allure Plugin will try to access working directory of the previous build and copy contents of allure-report\history folder to the current report contents. At the moment history entry for test case stores information about up to 5 previous results.