In the next few articles from the Automation Tools Series, I will show you different test automation reporting solutions. Finally, there will be an article comparing them showing their pros and cons. Test automation reporting and visual representation of test results is something crucial for the successful test automation project. Moreover, it can save you a lot of time analyzing the tests results, especially if there are many failing entries. The integration with this type of solution is one of the main features of the 5th generation test automation frameworks.
What Is Azure DevOps CI?
Azure DevOps offers one of the best CI on the market. Instead of using 3rd party tools or systems you can directly publish the results in Azure DevOps.
Why did I decide to write about it? Well, we had to determine how to analyse the 6000+ automated tests verifying each feature of our framework BELLATRIX. So, to choose the best tool for the job we created spike projects for the most popular ones. Besides that, we will offer full integrations with all of these tools in the framework. By the way this was our final choice. Right now all of our 40 builds are run in Azure DevOps CI. We visualize all of the results using the dashboards which you can see below.
You can create fully customizable dashboards to visualize the tests results and the latest status of your builds.
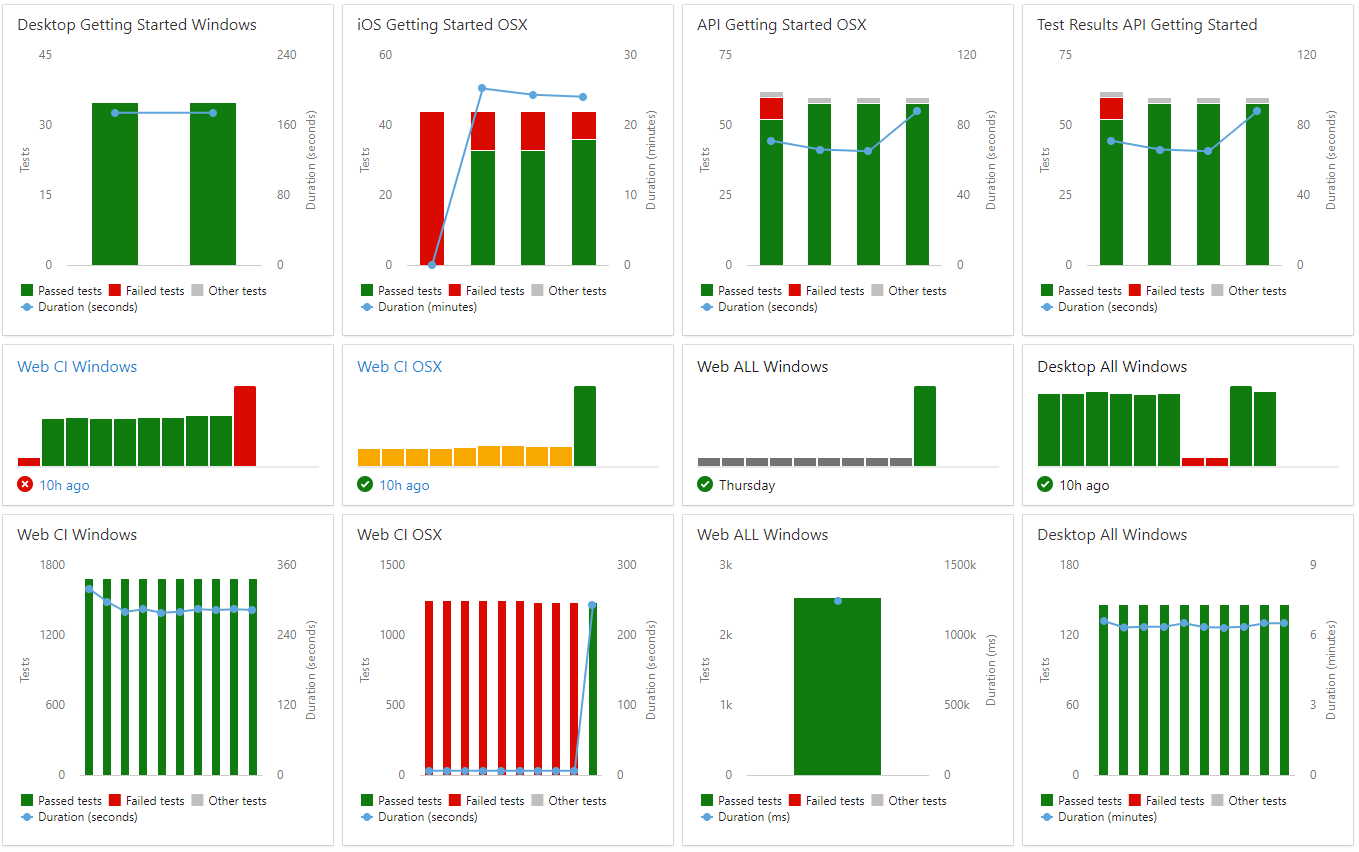
It offers a well designed interface for filtering and checking the latest published test results.
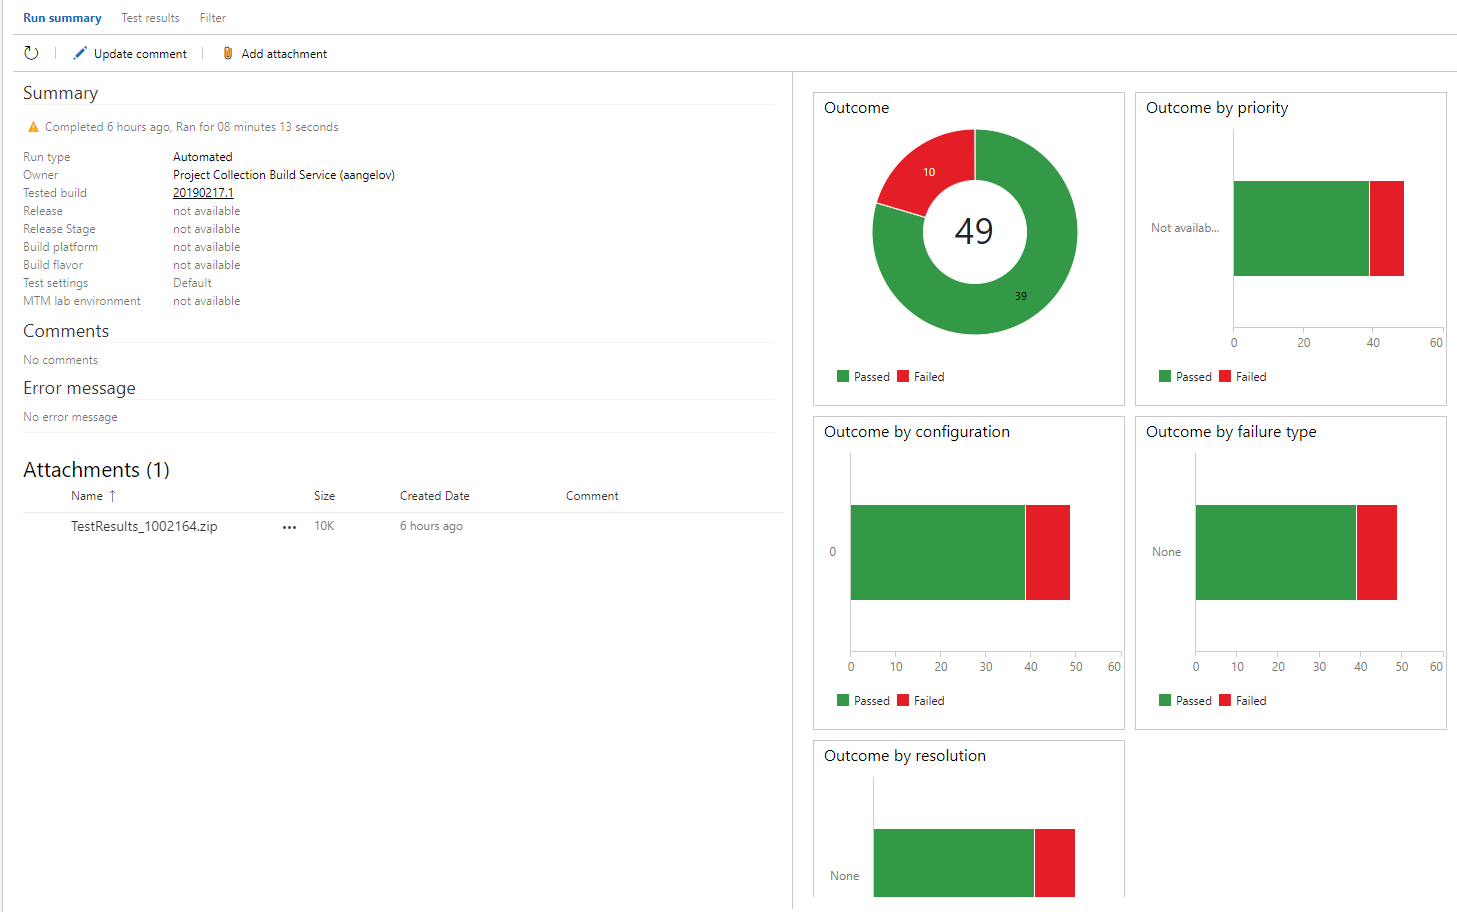
Also, you can see a summary with some informative charts.
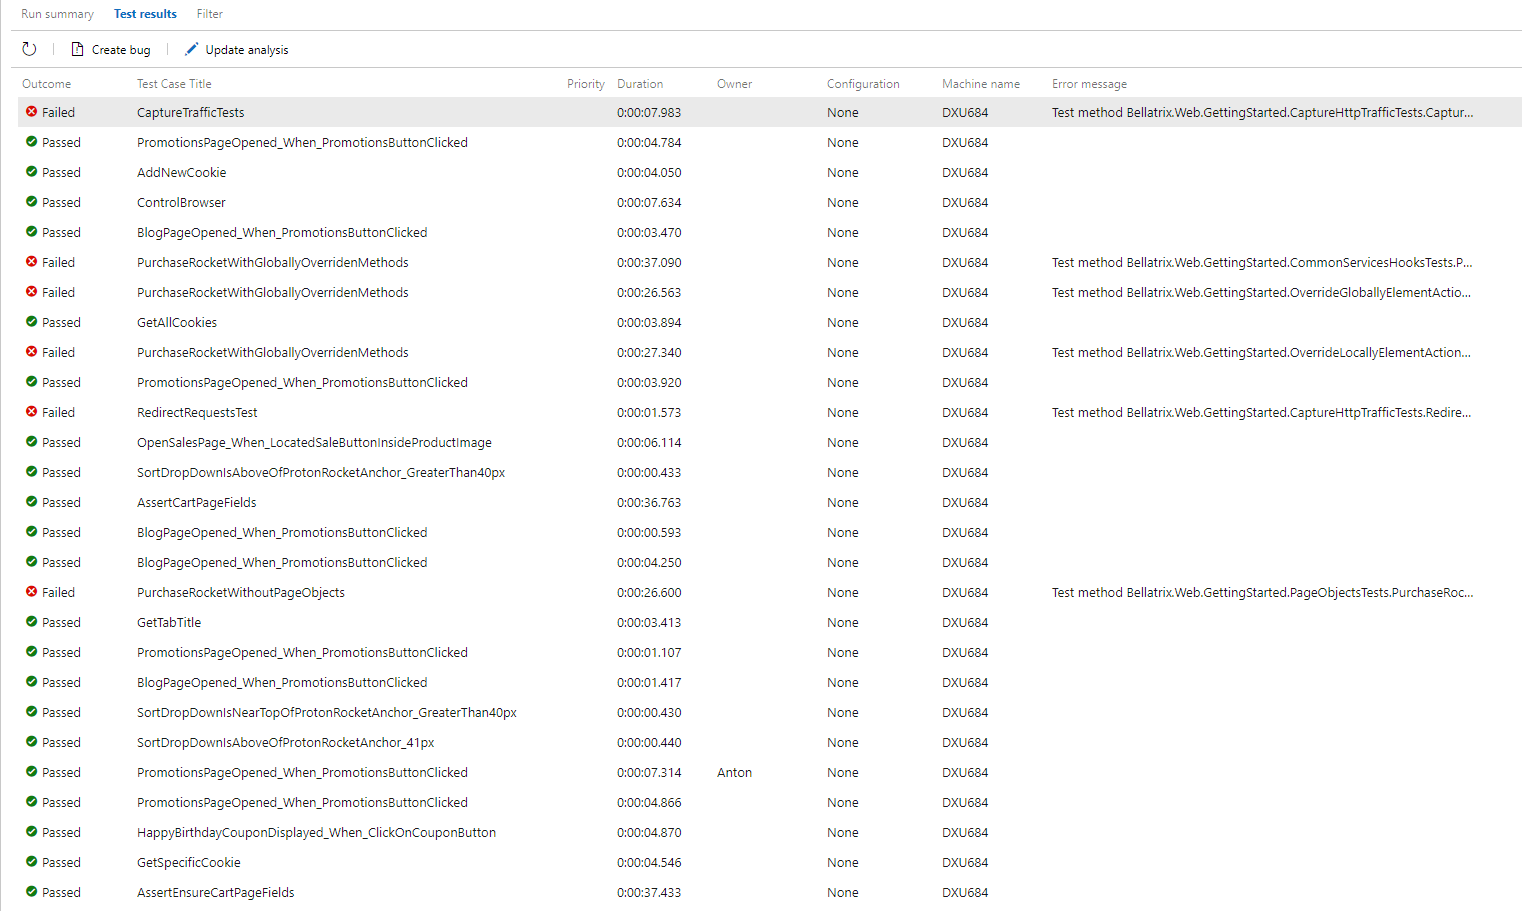
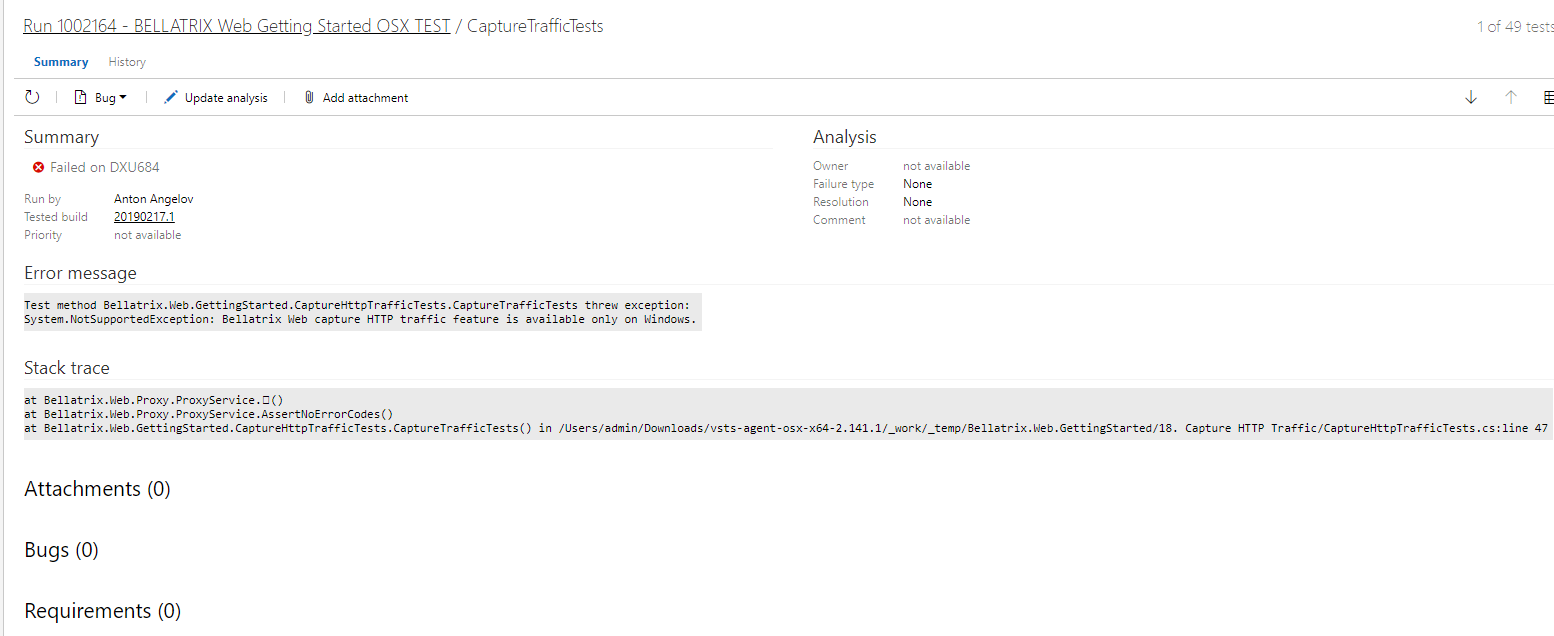
If you open a failed tests, you can find detailed information why your tests failed. I will show you in a bit how to display here screenshots or video recordings of your failed tests.
How to Publish Test Results to Azure DevOps CI?
1. Run your tests using the native .NET Core or .NET test runner depending on the test framework
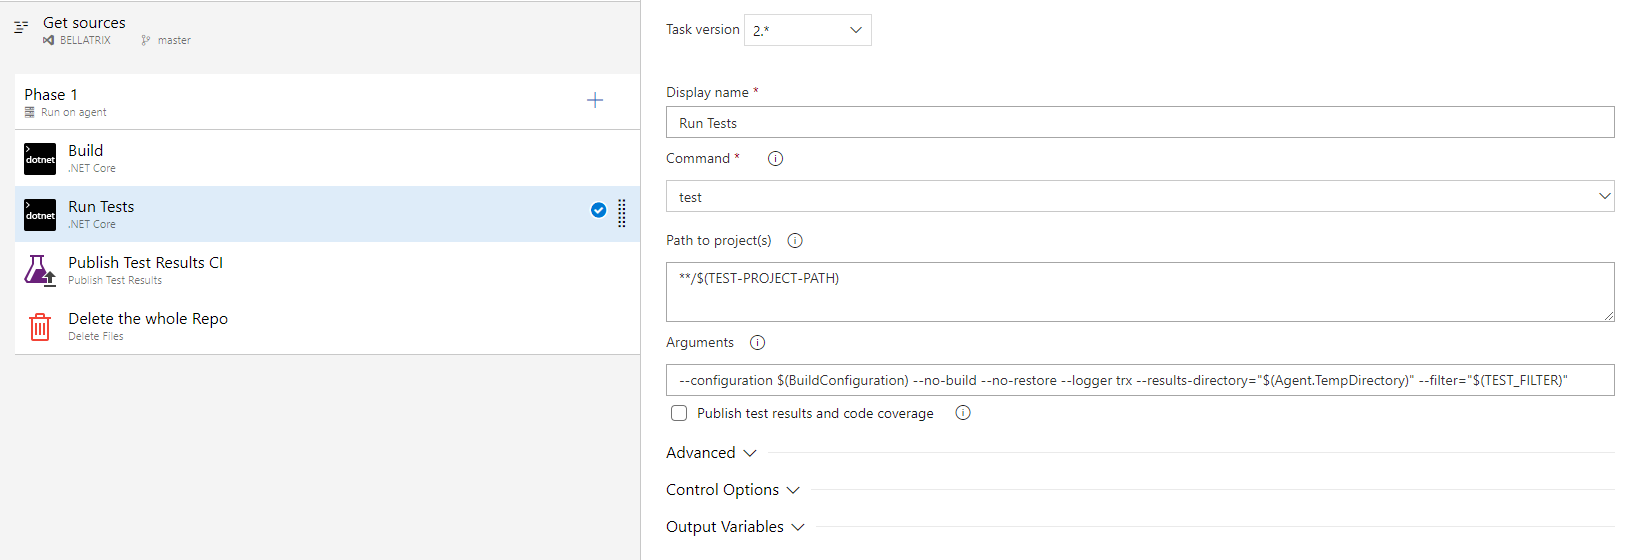
Your first option to publish the test results is to check the checkbox under the Arguments section- ‘Publish test results and code coverage’. However, the created run will be with a random name.
2. Add ‘Publish Test Results’ step to the build definition
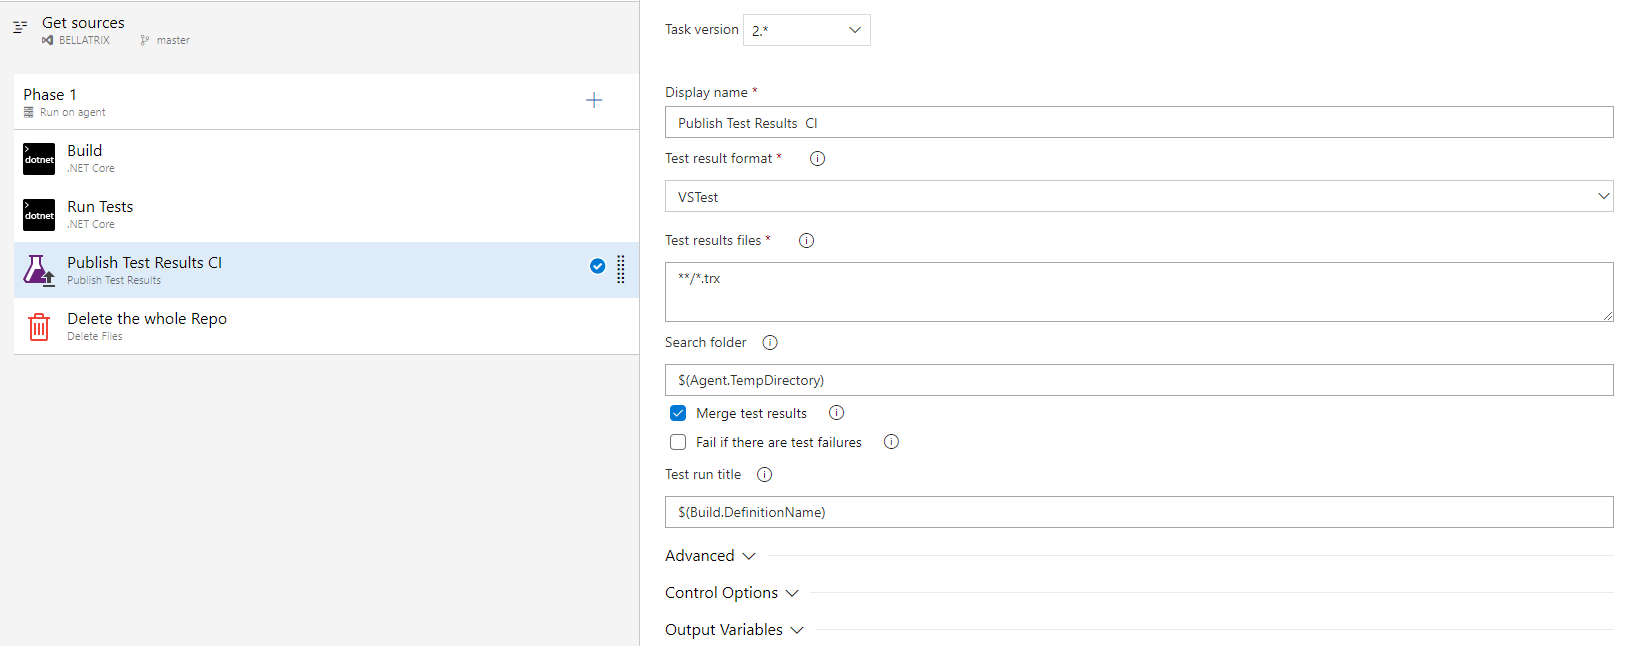
This step is quite powerful since it can even merge automatically multiple test results files. Also, for the test run here, we set the current build definition name instead of the random generated one.
How to Upload Screenshots or Video Recordings from Tests?
If you want to upload a screenshot or video recording for MSTest or NUnit tests you can use the bellow code snippet.
TestContext.AddTestAttachment("screenshotPath", "image on fail");In the newest versions of the MSTest v.2.0, this should be working.